Client Setup
Contents
Clients Login
The private site will allow you to share selected information about horses in EquisoftLive with their owners.
To do this we must:
- Create a Client account (the account the owner will use to sign into the private site)
- Indicate what horse information should be shared and at what level
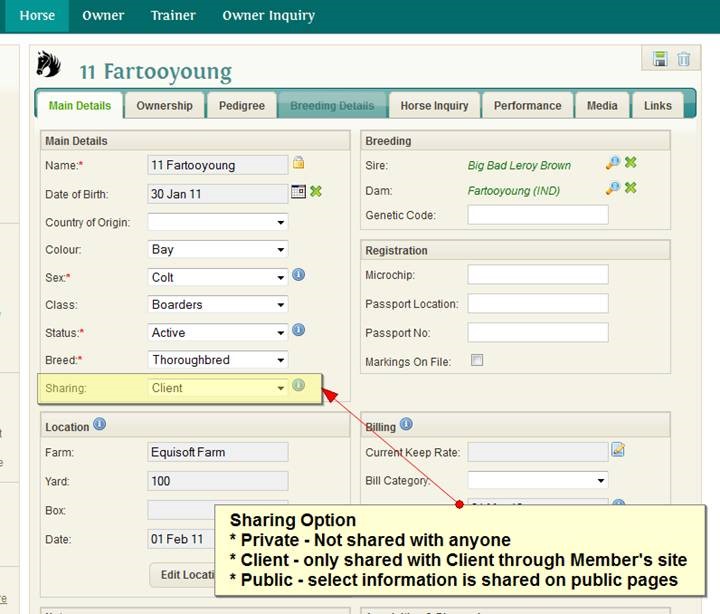
- Private: Not shared with anyone
- Client: Only members with a client login can view it in the private site
- Public: Selected information will be made available on a public page (for example the horse in training section on the public blog, this needs to be public as visitors to the site cannot sign in to view it.)
Create A Client Account
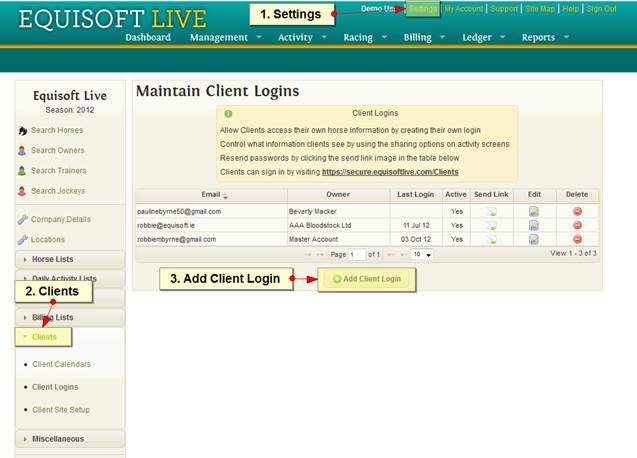
- Navigate to Settings > Clients
- Click Add Client Login
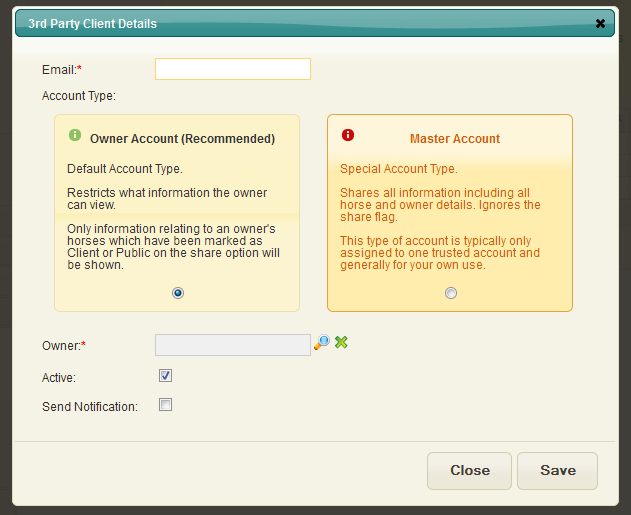
- A new popup window will appear
- E-mail: This should be the e-mail of the Client. The person with whom you wish to share horse information through the clients site.
(they will sign into the clients site using this e-mail as their username at https://secure.equisoftlive.com/clients/
- There are 2 account type options.
In general you will always want the first one. It restricts the information to one particular owner and obeys the Sharing option on Daily Activities Horse etc’ The second account type called Master Account is probally an account you will only create one of. It displays all the information that is entered against horses in the main system.
- Send Notification: When checked the Client will be sent an e-mail with details on how to set up their account. You will probably want to check this for new accounts.
- Once you are happy with these details you can click save.
- You should get an e-mail which will allow you to set your password. (All clients set their own passwords, and there is a facility for them to reset their passwords so you do not have to manage that yourself).
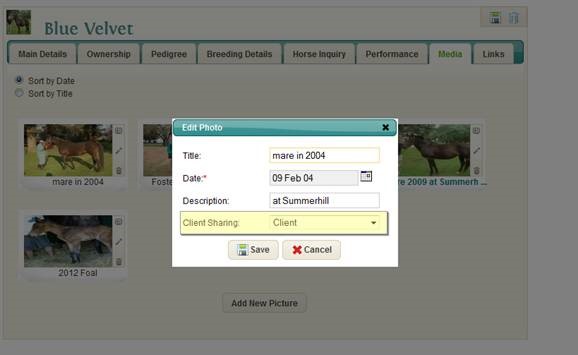
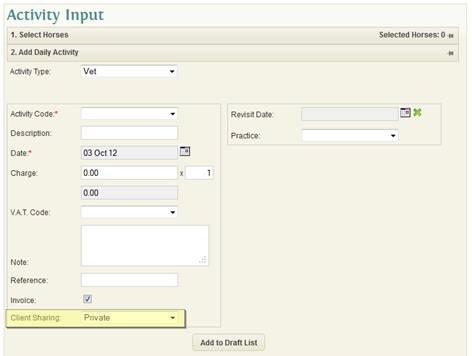
You will see a new option on certain input screens in EquisoftLive called ‘Share’ this determines if the information is shared with the Client. (master accounts ignore this so please be careful who you give a master account to)
Horse Window
Media Tab in Horse Window
Activity Input
That’s all the main areas. There are other options such as Settings > Client Setup that will allow you to turn off sections in the private site that you do not want visible to any of your members.
Using the Members Site
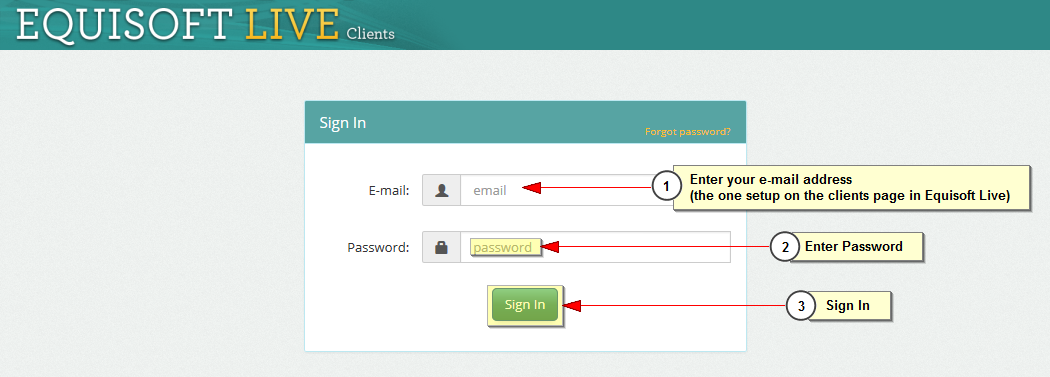
To use the member site go to https://secure.equisoftlive.com/clients/ and enter the e-mail address and password setup in EquisoftLive clients section. Please note as an administrator you do not get to set passwords for your clients, they will setup a password themselves after you send them an invite from EquisoftLive.
There are 5 main sections to the members site
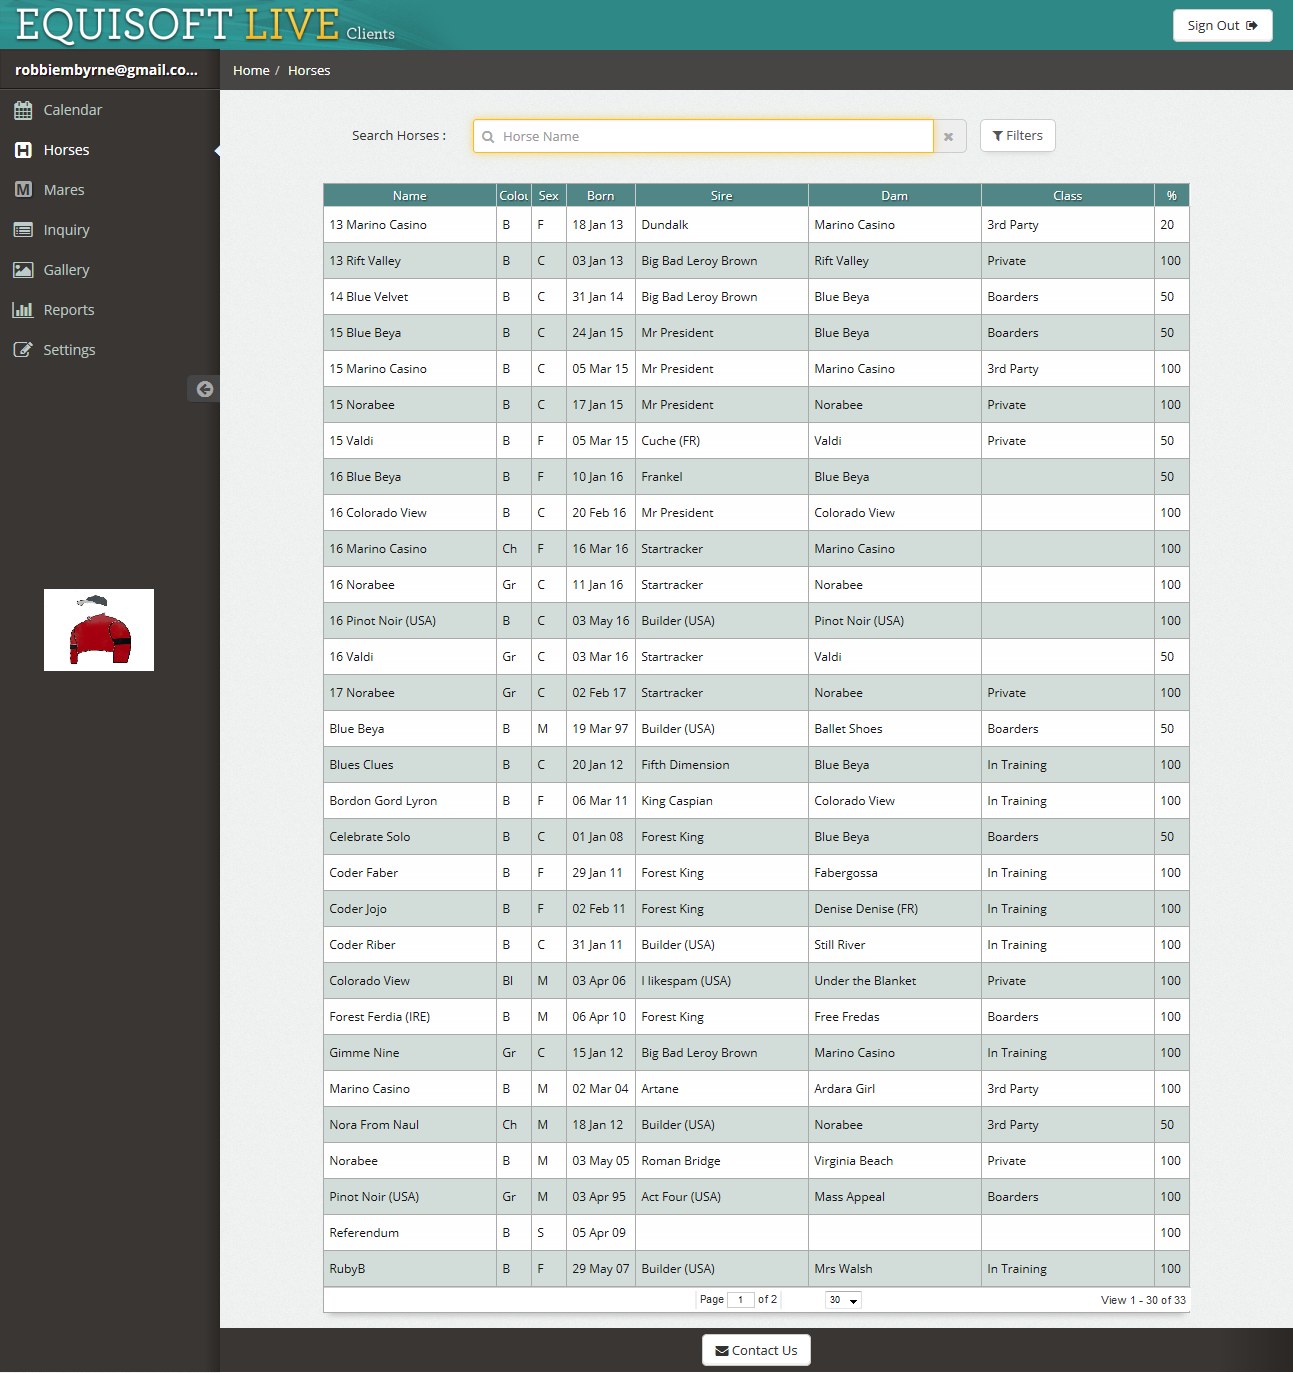
- Dashboard (including Calendar) - This displays a list of the shared horses. Members can click on a row to view full details of the horse.
The calendar will display items in a calendar layout. These items can include vet treatment dates.
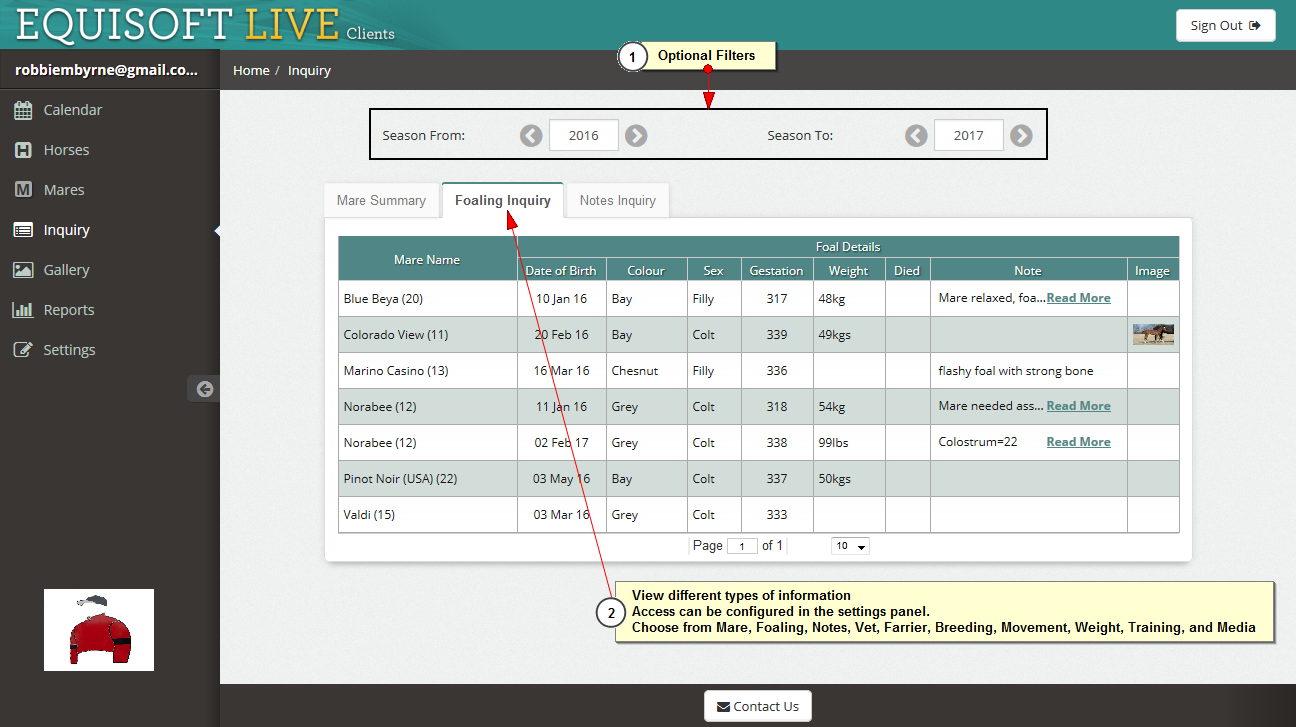
- Inquiry - Similar to the inquiry screen in EquisoftLive. This window will allow members to use filters to view any activities associated with their horses
- Media - Displays any pictures associated with their horses
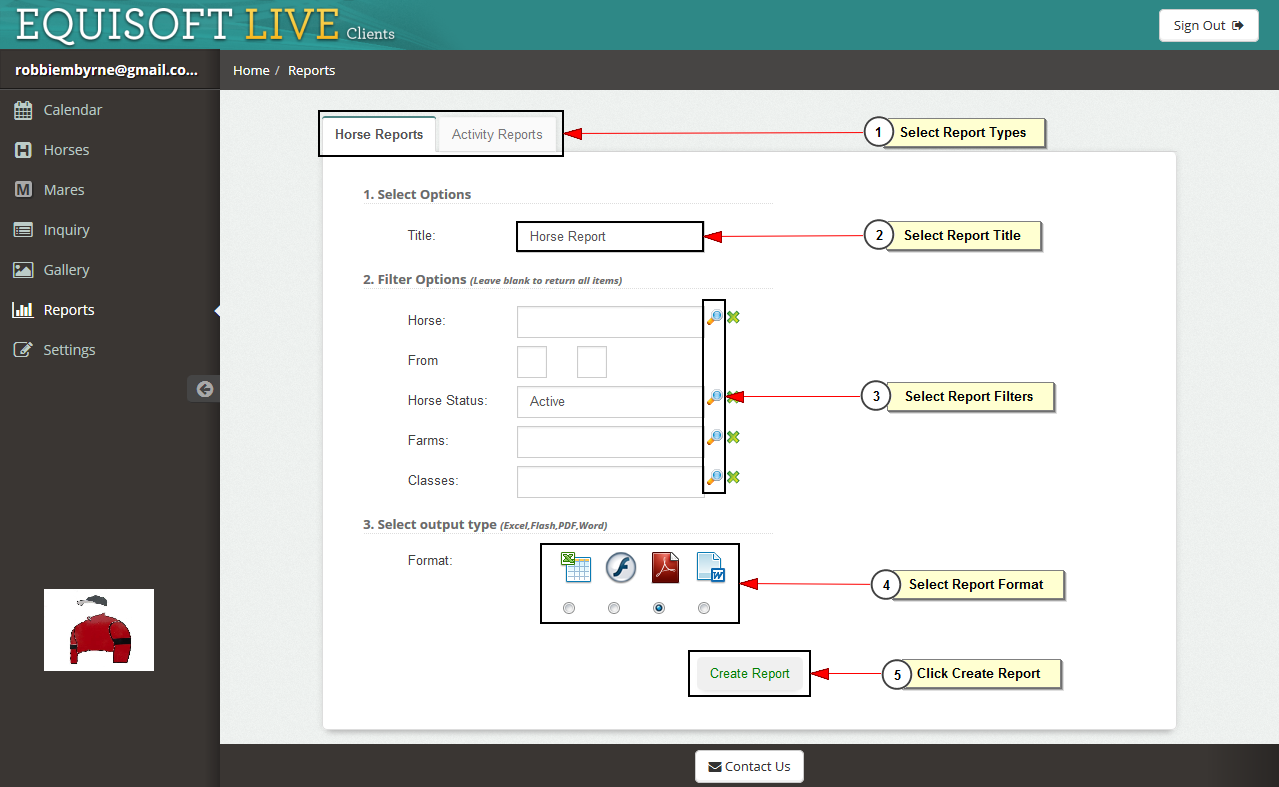
- Report- Includes a selection of reports that the user can run. Again similar to EquisoftLive but they will only see information about their own horses (those marked as share).
- Settings - Allow users to change their password and other settings.
